Vape device leakage is more than a minor inconvenience. It can stain clothing, damage a charging surface, and affect the device’s performance. For adult users in places where vaping is lawful, understanding how to prevent vape device leakage begins with simple maintenance and careful handling.
In practical device inspections, leakage often appears around the pod, tank, mouthpiece, or airflow openings. A small amount of residue may indicate a worn seal, loose connection, overfilling, or unsuitable storage. Check the manufacturer’s instructions before changing any part. Use only compatible components. Mixing different pods, tanks, or liquids can create poor seals and uneven pressure.
Keep the device upright when possible. Avoid leaving it in a hot car, direct sunlight, or a tightly packed pocket. Heat can thin the liquid and increase seepage. Wipe the connection area with a dry, lint-free cloth. Do not use a device with cracked plastic, damaged threads, or persistent leakage. Stop and inspect it.
Small habits matter.
However, no guide can prevent every leak. Seals wear out, and manufacturing differences exist. I have seen users blame the liquid immediately, while the real problem was a loose pod or unnoticed damage. That mistake is understandable, but it deserves a second look. A reliable approach combines routine checks, compatible parts, correct storage, and prompt replacement when problems continue. These steps support cleaner handling and help reduce avoidable device failures without encouraging unsafe modification or misuse.
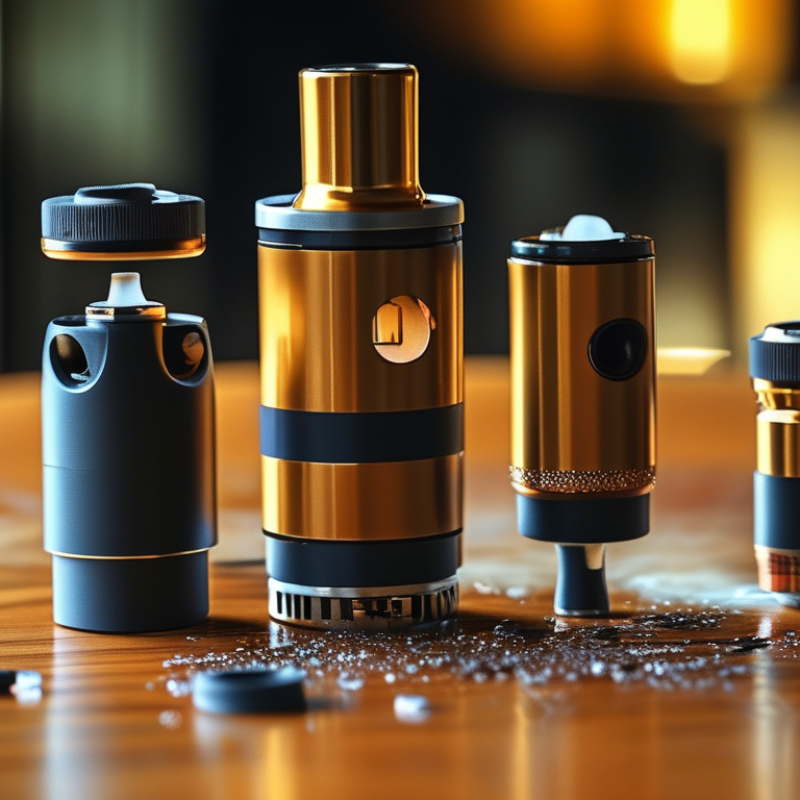
China Top Vape Devices: How to Prevent Vape Device Leakage?
Common Causes of Leakage in Vape Devices
Leakage usually begins with a small sealing problem. The tank may have a loose base, worn gasket, or poorly fitted coil. During routine inspections, technicians often find liquid around the airflow opening. This can look serious, but condensation sometimes causes the same symptom. Wipe the area first, then check whether fresh liquid returns.
Overfilling is another common cause. Leave a small air gap inside the tank. Excess liquid can enter the central airflow tube and escape through the mouthpiece. A damaged glass section may also disturb internal pressure. Replace cracked parts immediately. Do not force a tight component, because distorted threads can create uneven sealing. Small mistakes matter.
Temperature changes can increase leakage. A device left in a hot car may develop pressure inside the tank. Cold storage can produce the opposite problem after rapid warming. Keep the device upright and away from direct heat. Inspect the seals regularly, especially after cleaning. Use only components designed for that device, and follow the manufacturer’s instructions. I used to blame every leak on the coil, but that assumption was too simple. Some leaks begin with storage habits or unnoticed damage.
Vape device leakage usually occurs when e-liquid escapes from the tank, pod, coil area, airflow path, or mouthpiece. The table below summarizes common causes, observable signs, prevention methods, and recommended corrective actions.
| Common Cause | Why Leakage Happens | Typical Signs | Prevention Method | Corrective Action | Risk Level | Best Practice |
|---|---|---|---|---|---|---|
| Loose or Misaligned Seals | Silicone gaskets or O-rings may not sit correctly after assembly, cleaning, or coil replacement, creating a path for e-liquid to escape. | Moisture around the tank base, pod connection, or filling port. | Check that every seal is flat, clean, undamaged, and correctly positioned before use. | Remove the tank or pod, wipe all contact surfaces, reseat the gasket, and replace it if stretched, cut, or hardened. | High | Inspect seals during every refill or coil change. |
| Overfilling the Tank or Pod | Filling beyond the recommended level leaves insufficient air space and can force e-liquid into the airflow channel. | Gurgling, spitting, wet airflow, or liquid entering the mouthpiece. | Keep the liquid below the maximum fill line and avoid filling the central airflow tube. | Remove excess e-liquid with a tissue, gently clear the airflow path, and avoid repeated overfilling. | Medium | Leave a small air gap when the device design requires it. |
| Damaged or Worn O-Ring | A torn, flattened, or chemically degraded O-ring cannot maintain an airtight seal between components. | Persistent seepage from a joint even after tightening. | Keep replacement seals away from sharp tools, excessive heat, and aggressive cleaning chemicals. | Replace the damaged O-ring with the correct size and lubricate it lightly with a small amount of e-liquid before fitting. | High | Do not use a device with visibly damaged sealing parts. |
| Loose Tank, Pod, or Coil | Insufficiently tightened components may leave gaps, while cross-threading can prevent proper contact between sealing surfaces. | Leakage at the threaded connection or around the coil base. | Install components straight and tighten them firmly by hand without excessive force. | Disassemble and inspect the threads, clean the connection, then reinstall the parts without cross-threading. | High | Hand-tight is generally preferable to over-tightening. |
| Incorrect Coil Installation | A coil that is not fully seated or has a displaced seal can allow liquid to bypass the intended wicking path. | Leakage from the lower section, flooding, or unusually wet vapor. | Ensure the coil is compatible with the device and fully seated according to the device instructions. | Remove and reinstall the coil; replace it if the coil seal is damaged or the coil is visibly deformed. | High | Check coil seating whenever leakage starts after a coil change. |
| Excessive Heat | High ambient temperatures or prolonged exposure to sunlight can reduce e-liquid viscosity and increase internal pressure. | Seepage after storage in a hot vehicle, direct sunlight, or a warm location. | Store the device upright in a cool, dry place away from direct sunlight and heat sources. | Allow the device to cool, wipe it dry, and inspect seals before using it again. | Medium | Avoid leaving filled devices in hot cars or near heaters. |
| Cold Temperature and Rapid Warming | Temperature changes can alter liquid viscosity and internal pressure, increasing the chance of seepage during warming. | Leakage shortly after moving the device from a cold environment to a warm one. | Let the device reach room temperature gradually and store it upright. | Wipe away condensation or e-liquid, then check the tank, pod, and seals for damage. | Low | Avoid abrupt temperature changes during storage and transport. |
| Improper Storage Position | Storing a device on its side or upside down may allow liquid to remain against airflow openings or seals for extended periods. | Liquid around the mouthpiece, airflow holes, or device connection. | Store refillable devices upright with the mouthpiece facing upward whenever possible. | Place the device upright, clean the airflow openings, and check for loose parts. | Medium | Use a protective case that keeps the device stable during transport. |
| Excessive Suction or Inappropriate Inhalation | Very forceful or repeated draws can pull more e-liquid into the coil chamber than the wick can vaporize. | Flooding, gurgling, spitting, and liquid in the mouthpiece. | Use steady, moderate draws and follow the device's recommended operating range. | Clear the excess liquid from the mouthpiece and airflow path; replace the coil if flooding continues. | Medium | Avoid forceful pulls, especially immediately after refilling. |
| E-Liquid Viscosity Mismatch | Very thin liquid may enter the coil chamber too quickly, while unsuitable liquid can overwhelm the wicking system. | Frequent flooding, gurgling, or leakage despite correct assembly. | Use e-liquid viscosity appropriate for the device and coil design; follow the device instructions. | Remove unsuitable liquid, clean the tank or pod, and refill with an appropriate formulation. | Medium | Do not assume every e-liquid is suitable for every device. |
| Blocked or Restricted Airflow | Condensation, dust, or e-liquid residue can obstruct airflow and disturb pressure balance inside the device. | Restricted draw, gurgling, condensation, or liquid appearing at airflow holes. | Keep airflow openings clean and avoid placing the device on wet or dusty surfaces. | Turn the device off if applicable, remove the tank or pod, and clean the airflow path with a dry tissue. | Medium | Clean the mouthpiece and airflow openings regularly. |
| Cracked Tank or Pod | Impact damage, stress around the filling port, or repeated tightening can create a path that seals cannot close. | Visible cracks, sudden leakage, or liquid loss during storage. | Protect the device from drops and avoid excessive force when installing components. | Stop using the damaged tank or pod and replace it; do not attempt to seal cracks with household adhesives. | High | Inspect transparent components after impacts or falls. |
| Worn or Saturated Wick | An aging coil or wick may no longer regulate liquid flow effectively, allowing excess e-liquid into the vaporization chamber. | Repeated flooding, muted flavor, leaking, or unstable vapor production. | Replace coils or pods at suitable intervals and avoid operating with a heavily worn coil. | Install a new compatible coil or pod, then allow the wick to saturate before vaping. | Medium | Replace the coil when performance declines or flooding becomes recurrent. |
| Improper Filling Technique | Liquid entering the center tube, leaving the filling port open, or closing the cap unevenly can cause immediate leakage. | Liquid in the chimney, wet mouthpiece, or leakage immediately after refilling. | Fill slowly along the inner wall, keep liquid out of the center tube, and close the filling port completely. | Clean the mouthpiece and airflow channel, then verify that the filling plug or cap is fully closed. | Medium | Refill on a stable surface with adequate lighting. |
| Condensation Mistaken for Leakage | Vapor can cool inside the mouthpiece and condense into small droplets without a tank seal failure. | Light moisture inside the mouthpiece with no visible liquid loss from the tank. | Keep the mouthpiece clean and use smooth, consistent inhalation. | Remove the mouthpiece if possible and wipe the inside with a dry tissue. | Low | Differentiate condensation from continuous e-liquid leakage before replacing parts. |
Safety Note: If e-liquid reaches the battery area, charging port, or electrical contacts, stop using the device immediately. Disconnect it from power, keep it away from heat and ignition sources, and follow the manufacturer's disposal or service instructions. Do not charge a wet or visibly damaged device.
Leakage often comes from a loose base, worn gasket, or poorly fitted coil. Condensation can look similar. Check whether fresh liquid returns after wiping.
Wipe the airflow area with a dry, lint-free cloth. Wait briefly. Fresh liquid suggests leakage, while light moisture may be condensation.
Yes. Leave a small air gap inside the tank. Excess liquid may enter the central airflow tube and escape through the mouthpiece.
Turn it off before inspection. Use bright light to check the glass, seals, coil connection, and filling port. Look for cracks and gaps.
Replace cracked glass or torn seals promptly. Flattened seals usually need replacement. Do not force tight parts or distort their threads.
Tightening the tank too hard can deform its seal. Soaking electronic parts can also cause damage. Wipe components carefully, then let them dry completely.
Heat inside a parked car can increase tank pressure. Cold storage may create problems after rapid warming. Keep the device upright and away from direct heat.
Stop using the device immediately. Do not open the battery housing or attempt electrical repairs. Seek professional service or approved local disposal guidance.
Refill slowly below the marked level. Close the filling port firmly. Keep the device upright for several minutes. My earlier coil-only assumption was too simple.
Preventing leaks starts with understanding their common causes, including overfilling, loose connections, damaged seals, incorrect coil installation, and sudden temperature changes. To learn how to prevent vape device leakage, choose a device with secure threading, reliable seals, and a well-designed airflow system. Fill the tank slowly without exceeding the recommended level, keep e-liquid away from the central airflow tube, and ensure the coil is fitted firmly and evenly. Allow a newly installed coil to absorb e-liquid before use to reduce flooding.
Proper storage and regular maintenance are equally important. Keep the device upright in a cool, dry place, avoid leaving it in extreme heat, and check the tank, mouthpiece, coil, and seals regularly. If leakage occurs, empty the device, clean all parts with a dry cloth, inspect for cracks or worn components, and replace damaged parts when necessary. These simple habits can improve performance, reduce mess, and help extend the device’s usable life.

 Luvn Vape